Category: cabinet story

  • Living Room Lighting Tips

    Living Room Lighting Tips

    As the beating social heart of your home, your living space is where everything happens. From immersive movie nights to frenetic family gatherings, it comes as no surprise that your lounge is the happiness hub of any house. So how does one make a living room tailored for every scenario? The answer to that is in lighting. Find out how you can make your perfect vibe with these easy tips.

    Light Layering

    The quintessential rulebook for a complete room, applying multi-source layered lighting via ambient, accent, and task lights is important to bring out depth and focus while enjoying general illumination.

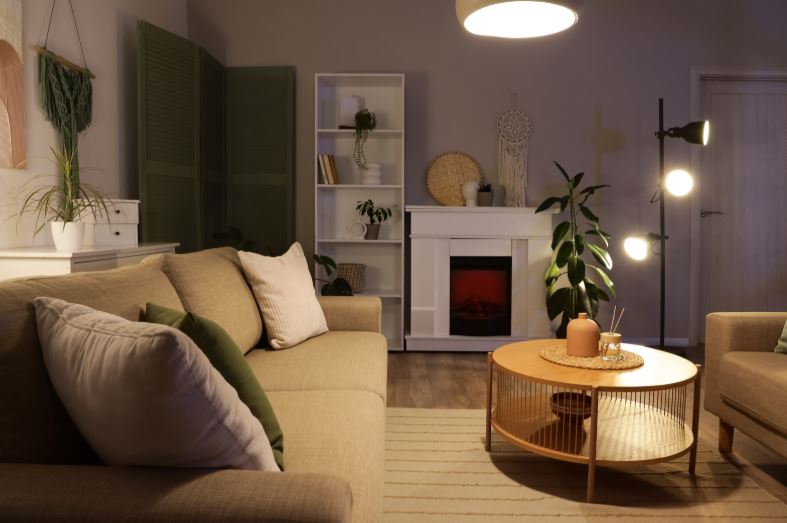
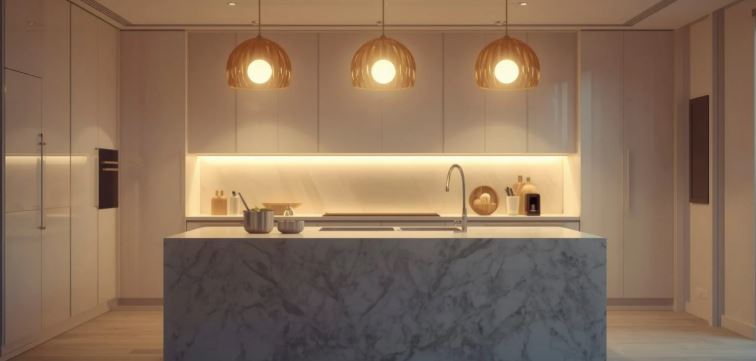
    Ambient Lighting: Your typical overhead lights, ambient lighting encompasses the entire room, providing general illumination. It covers a space well enough alone, but only by collaborating with accent and task lighting does it truly elevate your living room. Ambient lights can come in recessed fixtures, chandeliers, or ceiling oysters.

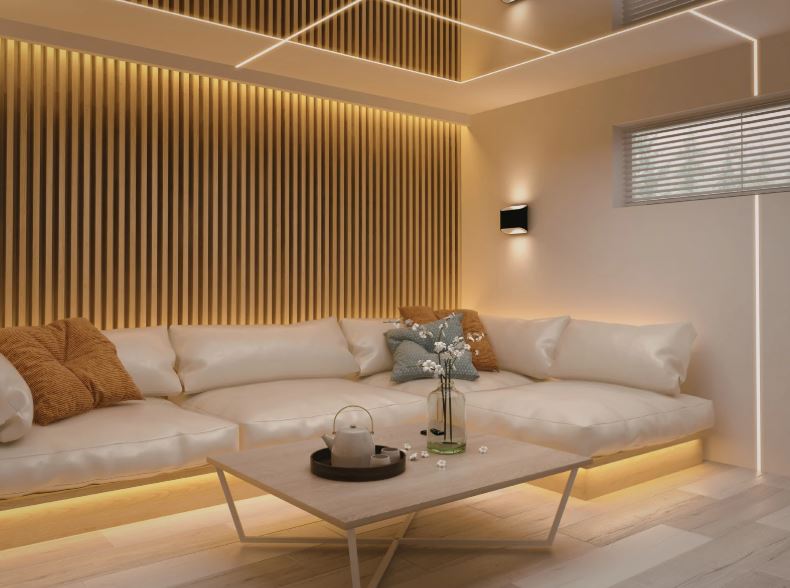
    Accent Lighting: These lights often cover a small, specific area or display piece, and are used to highlight or provide depth. Subtle under-frame lights for a painting, LED strips lining display cabinets, or perhaps mini-spotlights to highlight a hard-won trophy or luscious house plant – these are all great examples of accent lighting at work. Yes, even those pulsating LED wall tiles count as accent lighting.

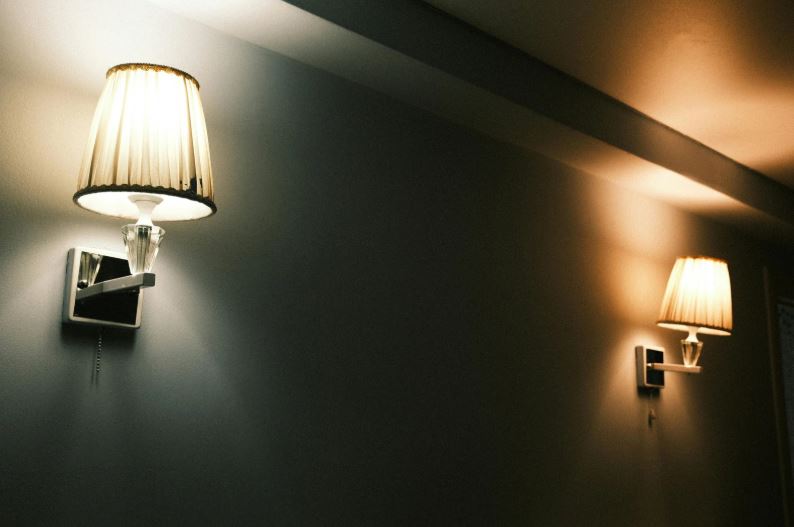
    Task Lighting: Aimed at facilitating a particular task, these lights often cover a local area within the room. For your living room, consider having a seat-side lamp for reading. It can be anything from a small desk lamp, to a standing floor lamp. If your living room has a space for homework or writing, a sturdy table light or wall scone makes for great task lighting.

    Adjustable Lighting

    The ideal lighting for cosy family evenings and raucous guest gatherings will invariably be different. For this reason, it can be beneficial to have lighting that can adapt to different circumstances. There are a few ways to achieve this:

    Adjustable Colour Temperature: It would be handy to have both cool and warm whites at your disposal. Cramming differing light temperatures into a single room used to be quite the feat, but now this can be achieved via smart lights. Now in 2026, it’s exceptionally common to find adjustable smart lights in all sorts of form factors, making changing hues as easy as opening an app. Many aren’t even limited to your typical home-friendly colours. If you wish to plunge your living room into deep rave purples, look for bulbs with full RGB support.

    Adjustable Brightness: This function often came in the form of dimmer switches. If you didn’t already have one installed, it could be a pain to wire. Most smart bulbs also feature adjustable brightness, which is often also app-controlled. However, some people prefer the touch of a physical switch, which is where smart dimmers come in, with many allowing wireless control of a room’s brightness, provided you have the compatible lights. This allows for both moody movie nights and vibrant social gatherings.

    Light Positioning

    So, you have the right lights, but are they in the right places? There are a few considerations that might go unnoticed until everything is already installed.

    Spatial Positioning: When it comes to putting down accent lights, try and keep the units properly distanced and even. Turning off your main lights, do your accents tend to pool together, is one side fully lit and the other dark? It may be hard to notice the contrast with your ambient lights on, but good accent spacing can make each showpiece its own attraction.

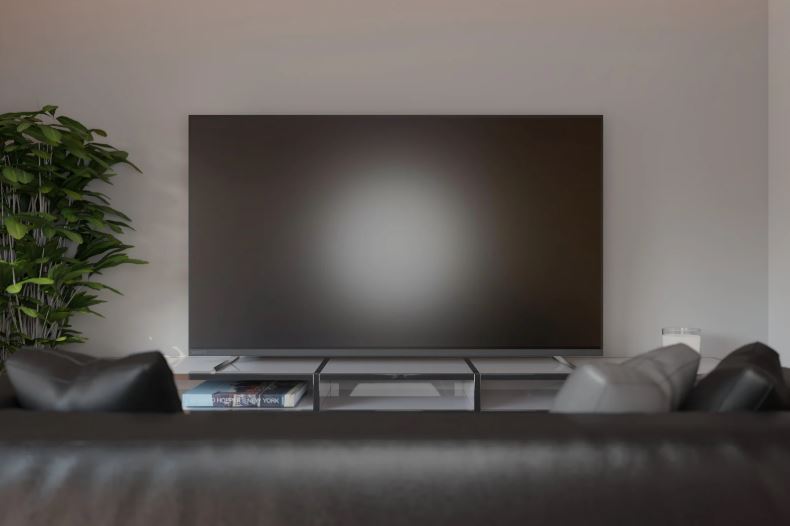
    Glare: For those of you that enjoy streaming, gaming, or simply tuning in to the news, having a bright background lamp drown out your TV can be quite the glaring problem. Make sure overhead lights are positioned away from your TV, or vice versa. Similarly, pale furniture can reflect light, further brightening a room, while dark furniture can absorb a bit of that light.

    Varying Light Types: Aside from LED strips and table lamps, you can consider applying indirect lighting, which first bounces off a surface before providing illumination. Adding pendant lights, wall scones, and corner lights can be useful to in making a room seem welcoming without being overwhelming. Finally, don’t forget about arguably the most important type: natural light. Adding it to the mix during daytime can create some seriously slick combos.

    While typical room lighting is easy to achieve, it’s the details that really make your living space pop. From adding depth and colour diversity to spatial positioning, lighting can be masterfully used to breathe life into the centre of your home.

    Sources:

    Living room lighting: ideas, tips & inspiration | Gira

    How Do I… Light My Living Room? | Houzz NZ

  • Bathroom Cabinetry: Aesthetics with Water-resistant materials

    Bathroom Cabinetry: Aesthetics with Water-resistant materials

    Often neglected, yet nonetheless an essential part of any home, the bathroom serves as an important litmus test when hosting guests. Even if you have a state-of-the-art kitchen with perfect, premium cabinetry, neglecting your bathroom can speak volumes about the rest of the home. Thankfully, bathroom vanities have seen just as much innovation in material diversity. Here are some of the top contemporary choices when it comes to the base:

    Solid Wood: Traditional, rustic, and positively dripping with style, solid wood is the timeless choice that offers top-notch toughness and durability, often growing more refined with age. These can handle bulky countertops and tough loads such as multi-basin layouts. Capable of being refinished, solid wood is a material that can evolve with you well into the future. One of the major downsides is the high cost and vulnerability to humidity. Even its use in kitchens requires good sealing, and that’s doubly true when it comes to bathrooms. Water seeping in can cause bloating, rot, and structural weakness.

    MDF: A popular contemporary choice for bathrooms, MDF is a versatile platform whose strength lies in its affordability and aesthetic malleability. Able to play host to a wide range of finish products such as melamine, veneer, laminate, paint, and polyurethane. You can have full black matte vanities, glistening bold laminate vanities, or traditional shaker-style faces – the possibilities are endless. Its waterproofing largely depends on the finish used. Polyurethane, for example, is excellent for resisting moisture, but can also be costly. In contrast, paint can chip, and DIY applications may leave room for gaps. Without proper sealing, MDF can swell and warp.

    Frame Vanity: Often composed of a rigid metal or steel structure, these barebones bodies are stronger than they look. While they may resemble the skeleton of vanities past, these bar-based bathroom frames often tout the best price-durability ratio. Their metal construction can handle even the toughest of countertops with strength to spare while also being practically waterproof. Owing to their barebones structure, however, means they often don’t come with many storage compartments. Perhaps the most visible downside is the lack of aesthetic compatibility. Their direct and essential nature appeals best to commercial spaces, but can still work well in homes, so long as the rest of the bathroom doesn’t clash.

    Particleboard: Affordable, lightweight, and sporting a diverse finish-set, particleboard is a common budget option for cost-sensitive bathrooms. While structurally weaker and more pliable than MDF, particleboard is just as capable of accessing the broad range of finishes made for engineered wood. If you’re going for particleboard, however, odds are you’re looking at melamine, laminate, or thermofoil rather than polyurethane. A good finish application can provide waterproofing that’s just as good vs an MDF substrate, but where particleboard’s weakness comes in is via its structural hold. You’ll have fewer options when it comes to choosing your benchtop and basin. Those will have to be lightweight so that the board’s vulnerabilities aren’t exploited.

    Natural Stone: Often serving as a high-end, all-in-one option that comprises both the base and the countertop, a solid piece of natural stone is the ultimate expression of bathroom luxury. Sometimes, even the basin is carved into the very surface. Commonly seen in premium hotels, malls, and resorts, these absolute units tout no equal when it comes to lavish presentation. Despite their looks, these stone vanities still come with some notable cons. Foremost is their gargantuan price tag, especially if you’ve suddenly developed a taste for Roman mountains. Second, natural stone’s porous nature means they need sealing just like any other moisture-vulnerable material. For stone, penetrating sealers work to fill the pours, while topical sealers form a protective surface film. Natural stone also offers few opportunities to incorporate cabinetry and storage.

    When it comes to the vanity’s body, wood or engineered wood often tout the most diversity in aesthetics and storage compatibility. Steel/metal frames give great waterproofing and durability at the cost of appearances and features, while natural stone invests all its points into simply looking stunning.

  • Eco-Friendly Cabinetry Materials for Sustainable Homes

    Eco-Friendly Cabinetry Materials for Sustainable Homes

    With New Zealand’s reputation as one of the foremost countries for sustainability and environmental awareness, making your cabinets from eco-friendly materials can help play your part in keeping this country green. While wood and its products are quintessential across joinery, there are many ways to help make a difference.

    Bamboo: Having risen in popularity over recent decades, engineered bamboo is fast becoming a top choice as a sustainable wood replacement. Technically a grass, bamboo is fast-growing and easily regenerative. Making appearances as cabinetry, decking, and even benchtops, bamboo is not only versatile, but also highly durable thanks to its multiple laminated layers of strips. The downsides are its higher cost and need for sealing. Also, exposure to sunlight and heat, plus natural aging can cause its colour to change over time.

    Reclaimed Wood: Salvaged and reused without breaking it down, reclaimed wood is often claimed from old structures and repurposed. It’s used more or less in its original form, which comes with numerous benefits. These include keeping its original looks, retaining its natural patina, and inheriting the history carried by the piece. When it comes to sustainability, few options can come close: reclaimed wood is simply reusing what already exists, rather than consuming energy to create something new. For making something with a certain rustic charm while championing the environment, there’s no better option.

    Low-VOC finishes: With many wood products in need of sealing for proper waterproofing and sustained durability, choosing a finish with low-VOC is an eco-friendly alternative. VOC stands for Volatile Organic Compounds, which create pungent-smelling finishes that release more harmful chemicals. Low-VOC or no-VOC finishes (paints, varnishes, sealants) often use a water base for reduced odour and fumes. The downsides of low-VOC are that they usually cost more and the application may not be as smooth.

    Transport Emissions: Since New Zealand is not the only country actively pursuing environmentally friendly products, many international names offer sustainable materials created through eco-friendly processes. While they may offer production advantages compared to local materials, you should also consider the cost of transportation – not in terms of the shipping fee, but with the emissions and carbon footprint produced. Consider locally-made materials to keep emissions down. Even non-biodegradable materials such as MDF offer improved sustainability vs hardwood and are produced with increasingly sustainable methods.

    Eco-Friendly Hardware: Even when accessorising your cabinets, there are environmentally friendly options. When picking your handles, for example, you can choose those made with reclaimed wood or recycled metals. Bamboo is again a good choice here. If it’s ornamentation you’re after, you’d be surprised with what you can find in local flea markets and op shops. Lastly, since modern kitchens are all about lighting, going with LEDs is more energy efficient, reducing both costs and extending its lifespan.

    There are many ways to source environmentally-sound cabinetry, with the best methods being choosing bamboo and reclaimed materials. For sealants and paint, choosing low-VOC solutions is great for a less invasive option. Whether you’re looking to build new cabinets or accessorise the ones you have, there are always options to help the planet and look good while doing so.

    Sources:

    Sustainability in Cabinetry: Finding the Right Balance | Carlielle Kitchens

    Cabinetry for Sustainable Homes: What Builders Should Always Include

    Color Questions :: Simply Bamboo

  • The Science Behind Layout and Practicality in the Modern Kitchen

    The Science Behind Layout and Practicality in the Modern Kitchen

    While having a beautiful, attractive, and aesthetically refined kitchen is of course important, looks can often overshadow performance, which is becoming increasingly relevant in today’s bustling modern household. Often playing second fiddle to outward appearances, the practicality of a kitchen entirely affects its usability. If appliances are the beating heart of a kitchen, then ergonomics are the circulatory system. Find out the science behind fine-tuning a kitchen, and why you should apply it.

    Layout: Within a kitchen, you’ll often find yourself bouncing between the three main working areas: the sink, cooktop, and fridge. This trifecta of pivotal roles forms the foundation of kitchen design and make up the aptly named “kitchen work triangle”. Make sure these spaces are 1.2 to 2.4 metres apart, with 4 to 8 metres as the total perimeter, without any other work paths infringing on its space.

    This triangle cuts down transition time drastically, while also ensuring that the space is free from any obstructions. As for entry, make sure you don’t have to walk the length of the kitchen just to enter it. This can be a problem with G-shaped kitchens if the entry isn’t positioned conveniently.

    Height: In the age of increasing heights and diversifying demographics, it can be rare to feel a perfect fit with a new kitchen. Since most benchtops aren’t adjustable like desks, taking some time to get it right can save you from a lot of backache. The typical working benchtop height is between 85 to 95 cm. See what’s suitable for your height below:

    • 150cm – 160cm = an 84cm high benchtop
    • 160cm – 170cm = an 88cm high benchtop
    • 170cm – 180cm = a 92cm high benchtop
    • 180cm – 190cm = a 96cm high benchtop

    A good rule of thumb is to put your palms flat on your benchtop and see if your elbows are resting at a 45-degree angle with your forearms. If so, then that height is a good fit. For placing shelves, keep them around 45-60 cm above the benchtop, or 65 cm above the cooktop, with essential shelves no more than 1.4 m off the floor. Proper shelving balances working space, accessibility, and cooktop clearance.

    Drawer Opening: It can be finicky having multiple drawers open, especially when going back and forth, bumping around the kitchen. At the same time, pushing them shut brings noise and possible damage. Consider self-close drawer slides to make closing worry-free, or soft-close systems, which dampen sound and minimise impact – all with just a gentle push.

    For lift-up cabinets, look for those with a stay-open mechanism so that you can retrieve goods with both hands. You can use the drawer size to sort goods: shallow drawers for cutlery, medium drawers for bowls, and deep drawers for pots and containers.

    Convenience Mapping: Unless you want to treat cooking like a marathon, aim at minimising the amount of movement needed to retrieve any and all goods. This includes your whiteware, appliances, and cooking tools. For example, keep your pans right by your cooktop at waist or shoulder height, keep your tableware cabinets next to your dishwasher, and avoid tucking away your favourites in bottom cabinet corners – your back will thank you for it.

    Having smart storage solutions can be a lifesaver in this instance: base cabinet pull-outs can provide easy access to pantry goods, while pull-out bins make short work of disposal with none of the smell. Consider putting your cabinet corner to work with a carousel unit for further space efficiency.

    Safety – When working around all sorts of sharp objects and hot surfaces, getting hurt is the last thing anyone wants. In addition to having drawers & doors closed, sound footing is also important. Check just how “non-slip” your flooring actually is, and how it works with footwear and socks.

    For nighttime working, consider installing task lighting such as under-cabinet LEDs for a focused work area. Toe kick illumination can be especially useful when left on after lights-off, providing you and your family with a guide and saving many a pinkie toe from those pesky stubs.

    Focusing on form over function is understandably popular, but it’s best to get a measure of your kitchen’s usability. While the effects of aesthetics are apparent immediately and fully, the effects of layout, height, and operability are often not discovered until later. Building your dream kitchen is a once-in-a-lifetime opportunity for many, and getting it right is just as important as ever. Make sure you get the ergonomics you want and find the balance that’s just right for you.

    Sources:

    https://www.nakedkitchens.com/blog/kitchen-ergonomics-make-your-kitchen-more-efficient

  • Handleless Cabinetry: A Modern and Practical Kitchen Addition

    Handleless Cabinetry: A Modern and Practical Kitchen Addition

    One of the staples of modern minimalism, the handleless trend is undoubtedly an ideal option for achieving the cleanest look possible. With so much noise and complexity in the world, coming home to a smooth and simple kitchen can bring a much-needed reprieve.

    Aesthetics: With a surge in popularity over the past two decades, modern handleless cabinetry is often found playing leading roles in minimalist kitchens around the world. They’re a great partner for any type of cabinet finish, but with a tendency to work better with glossy, single-colour panels rather than rustic hardwood or overly detailed patterns. Shiny or reflective cabinets can benefit from having nothing that interrupts the flow.

    Handleless cabinets are an ideal partner for melamine, vinyl, and subtle veneers. They’re also great for redirecting attention, drawing eyes to the material itself, nearby prized pieces like a benchtop or display shelf, and enriching their colours. Without a handle, the panels can achieve an extremely flush look, with the bare minimum of gaps to discern between cabinets. While the physical space handles take up is minimal, you’d be surprised by how much visual clutter can be freed by a handleless design.

    Practicality: The absence of handles is also the most magical part of these cabinets. In the kitchen, you will often extrusion profile handles being used. These aluminium handles are fitted over the top or side of a panel to create a recessed well in which you can grip and pull, often resembling the letters G, L, and U.  J-pull handles work similarly, but instead feature the groove cut directly into the panel material itself. Another mechanism is push-to-open, which operates exactly as it sounds.

    Even without noticeable handles, these panels are easy and intuitive to operate. It may seem hard to identify the grip location and opening direction, but these will come incredibly quickly and easily. Bereft of handles, you can also shed any worries of catching your clothes or bumping your hand.

    Maintenance: Perhaps the best part of maintaining handleless cabinets, the surfaces are easy to clean with nothing in the way. They also don’t smudge as much due to where you grip them. Opening recessed handles only requires force from inside the groove, which means you can open it without ever leaving a fingerprint. That being said, the grooves themselves still need occasional cleaning. Horizontal designs should be cleaned more often than vertical or upside-down arrangements since they can collect debris easier.

    Gentle cleaning with mild soap is perfect for keeping long term longevity of your handles. As far as durability is concerned, aluminium extrusion handles have next to nothing to worry about. Their recessed nature makes accidental damage next to impossible. For panels with recesses built into the cabinet material itself, harsh use can damage it over time, especially if cuts in the finish are left undiscovered, weakening the substrate.

    With great aesthetics and easy maintenance, handleless cabinetry is a top choice for modern households. They can enhance kitchens, bathrooms, and living spaces alike, drawing or refocusing attention to different parts of your home. While they typically fetch a higher price than traditional handles, the upsides can be well worth it if you’re looking for a minimalist change. If you’ve been hooked by the Scandinavian, Japandi, or modern minimalist styles, look no further!

    Sources:

    Handleless Kitchens: Effortless Elegance or Design Dilemma?

    How Practical Are Handleless Kitchens? What You Need to Know – BH BespOak

  • How to Communicate Your Design Vision

    How to Communicate Your Design Vision

    Have you recently begun plans to renovate your home? Seeing your vision brought to life is one of the greatest joys of being a homeowner. The role of an interior designer is to help manifest it practically. Planning out your dream with a designer can be a highly reflective, engaging, and rewarding process. The path to realising your vision often involves discovering more about yourself, but this path isn’t a one-sided effort: here are some of the best ways to make sure your designer dreams the same dream you do.

    Consultation:

    The initial stage involves some of the most essential building blocks of any project. With these, the designer can understand what needs to be done, and when. When first meeting with your designer, be sure to bring these to the table.

    Scope: Determine how big your project’s going to be and what’s to be changed. If you’re doing a kitchen renovation for example, do you need to tear down walls or redo floors? Will the layout as a whole change, or stay the same?

    Timeline: Think of when you would like your project to be done. Knowing your scope can help with the estimate. While it may not be set in stone, this can help your designer gauge your scale and set expectations.

    Budget: Also largely influenced by your scope, consider how much you’re willing to spend. This gives your designer a target, and they’ll let you know if the discrepancy is too big.

    Vision: Perhaps what has influenced you most on your renovation journey, think about your motivations for change. Is it for practical purposes? Did you come across a particularly striking design? Feel free to share whatever inspired you – it could be anything from an Instagram post, a mood board you found on Pinterest, or perhaps you’ve been swept by the Scandinavian sensation after a bustling IKEA visit.

    Collaboration:

    By the time you’ve hired a designer and are actively working with them, it’s finally time to let all your ideas loose. It’s perfectly fine to let the designer fill in the gaps for aspects you’re unsure of; what’s important is both parties being on the same page.

    Lifestyle Needs: At this stage, you can convey all of your non-negotiables and personal requirements. Are you someone who enjoys the quiet life? Does your family have staggered wake-up times? Consider some acoustic panels to dampen sound transfer. Maybe your kitchen is too cold in the morning – now’s the perfect chance to upgrade your windows. Will the shape of your kitchen benchtop make it hard to move in and out? Feel free to share your concerns with your designer – they can suggest some valuable solutions.

    Providing Sketches: If you’ve been thinking hard about the layout and have mapped out your vision – good job! It can provide a strong kick off point to launch the design process. Keep in mind that this will often evolve and change as the designers refine them into professional plans. Make sure to highlight your priorities and note what elements are still open to interpretation. Talk your designer through your thoughts, and when they provide their versions of the plan, be sure to clarify anything you’re unsure about.

    Bringing Your Idea: When it comes to renovations, you’ve probably put a lot of thought into the colours and materials. Whether it’s a Japandi living room or a transitional style kitchen, think about the elements that resonate with you most and communicate them. If you’re still unsure about the style you’re after, pick some images that really resonate with you, otherwise simply asking for a “modern” kitchen could yield drastically different results from your expectations.

    Terminology: While your designer will do their best to convey everything so that the two of you understand, getting to know some of their jargon can bridge any gaps in communication. A quick Google search can clear up much of the terminology and you’ll be able to use it to deliberate concepts & ideas better.

    Honesty: If you disagree with something the designer suggests, don’t stay silent and assume it will work out; it might end up bothering you after the work is complete. Don’t be afraid to express your feelings – your designer will always be ready with alternate suggestions. Make sure your assumptions have been clearly addressed. If you expect your cabinets to come with soft-close hinges, for example, check that they’re listed in the project or with your designer.

    Listening to Feedback: Professional designers are well-versed in knowing what works and what doesn’t. If they say that your layout isn’t ideal, or if your chosen styles clash, be sure to lend an ear to their advice. Balancing aesthetics, function, and feasibility is their job. Keeping open communication with them and taking feedback is the key to making the best space possible.

    Expecting Changes: Not sure if you’re going to live through your renovation at home? Ask your designer for their recommendation, or check out this handy guide on how you can make the most of a live-in renovation.

    By the time you’ve finalised your design, you’ll likely have learnt more about yourself. It’s as much a journey of self-discovery as it is renewal. In transforming your home, you’re actualising the self and painting reality with your vision – that is the product of a good, collaborative design effort.

    Sources:

    How to Present Your Design Ideas to an Interior Designer | Houzz NZ

  • How to Survive a Live-In Renovation

    How to Survive a Live-In Renovation

    If your home is about to go through some changes, you’ve probably put some thought into where you’ll be living during the works. Not everyone has extended family ready to accommodate them, or the extra budget to spend on temporary living. Depending on the scale of works, you may be able to save money and avoid waking up to an unfamiliar ceiling by choosing to stay at home while works complete.

    Can I Live-In During this Renovation? Before anything begins, figure out whether or not you need to leave your home. Look at where the scale extends to: if you’re doing a full home renovation or otherwise have all your bedrooms and bathrooms out of commission, you’re likely looking at finding a new place to sleep unless you have a granny flat sitting conveniently in your yard. If the work is partial, such as a kitchen, bathroom, or living space, you’ll probably be able to sit it out, and here are some of the best tips for doing so:

    Clear Navigation: It’s a great idea to plan your daily routine in advance for when construction happens. Think about the affected area and how it affects your routing around the house. Make sure you have unobstructed access to a bathroom, living area, and your kitchen (if it isn’t the target of works). Communicate with the builder about where their workers can and cannot go. If it’s your kitchen that’s out of commission, bring your microwave and fridge to the family space, along with a camping stove. Add some furniture, utensils, and tableware, you can set up your very own mini kitchen!

    Managing Sound: We’ve all heard the nuisance of neighbouring construction noise. While you many not be able to ask the workers to turn down their tools, you can effectively tune them out for you and your family. A lifesaver when it comes to international flights, having a pair of noise-cancelling headphones is perfect for sealing away the buzz & bustle of renovation while enjoying your tunes at the same time. If not, earplugs are also a great option.

    Tackling Clutter: Since you’ll be clearing away goods from the renovation space, you can take this time to decide what will stay with you into the new room. It’s a perfect time to undertake some overdue spring cleaning and your home will feel lighter for it. Invest in a few storage boxes to hold temporary items, as well as for stowing away objects you’re still on the fence about parting with. Also, expect quite a bit of dust during the works – move or cover furniture to keep them pristine!

    Proper Planning: Communication is what makes or breaks the renovation experience. Having the builder on the same page can save you from considerable headaches down the line. Be sure to get a detailed list of works as well as a schedule. This can show you exactly when you can expect works to take place, and what’s to be done. From here you can analyse if anything has been left out of the scope. Getting this sorted early can save you from a rude awakening – both literally and figuratively.

    Out of Sight, Out of Mind: The best way to avoid the dust and noise of construction work is to escape it. While spending all day away isn’t always an option, taking an afternoon trip is perfect for forgetting about the chaos. It’s an essential way of finding normalcy and resetting the mind. Taking a break and enjoying some fresh air can do wonders for making time fly.

    By living at home, you can save money and watch each stage of the work complete. With proper planning and setup, you can make the renovation process not just tolerable, but fun. It can provide you with a new experience and a fresh perspective while counting down to a brand-new space.

    Sources:

    Survive a live-in renovation | Hannah Bullivant • Interior Designer

  • Realistic Timeline for an Auckland Kitchen Reno

    Realistic Timeline for an Auckland Kitchen Reno

    Renovating your kitchen is an exciting journey that can breathe new life into your home. Depending on your scale and ambition, the process as a whole can get quite lengthy. Here’s a quick guide to get you up to speed on what you can expect out of your kitchen renovation’s timeline.

    Design & Consultation

    When you first begin, you’ll likely be looking for a trusted designer who can deliver everything you want out of your new kitchen. Visiting different designers and weighing their catalogues, selections, and quotes can be a great way of finding a good fit, but being reliable, experienced, and trustworthy is important too. When you’ve chosen your designer, working with them to determine the scale of work, kitchen design, layout, and more can last a few weeks but largely depends on the rate of communication between you and the designer. You can expect site visits and measurements during this phase.

    Material Selection & Ordering

    Here you’ll be finalising the materials used for your kitchen, including everything from the benchtop and cabinetry to fixed appliances such as the oven, cooktop, and rangehood. Once they’re locked in, the designer will order them. The ordering itself typically only takes 2 weeks, but finalising materials has the potential to drag out a renovation job. Constant communication and settling topics quickly can speed up the timeline. During this phase, you can spend the time getting your home ready for the kitchen work, such as setting up a temporary kitchen, protecting the floors, and making room for the tradespeople to move.

    Demolition

    When all is decided and the major components are ready, demolition can begin. This is when the old kitchen is removed, along with any other parts, such as flooring, walls, or columns. The used kitchen parts are typically dismantled and recycled, but good condition parts can be sold or repurposed for another room. Demolition usually only lasts a week, but could be longer if more than just your kitchen needs to be removed.

    Fabrication

    For designers that provide custom cabinetry (such as ourselves), they take time to manufacture your tailor-made cabinets in-house. This typically takes place after the design and renovation is locked in, and can take place concurrently with on-site efforts such as demolition and preparation. Fabrication involves taking the chosen cabinet materials and custom cutting them to match your home’s dimensions, leading to a much better fit compared to flat-pack or premade cabinets. This includes personalised accommodations for appliances and in-cabinet storage solutions. Fabrication typically lasts around 3 – 4 weeks.

    Site Prep & Rough-in

    This is when the old kitchen has been removed, and the tradespeople are preparing the room for the new kitchen. The process typically involves readying the electrical and plumbing systems with new wires and pipes. This phase can be long or short depending on the scale of your project. Notably, if your kitchen layout is planned to change, then the service connections will need rerouting, which requires more time. Complex renovations may require more than a month.

    Installation

    When the site is prepared and ready for your new kitchen, putting the parts together is the final phase of your renovation. This includes installing the cabinetry, benchtop, flooring, and hardware such as hinges, handles, and drawer systems. After, the splashback and fixed appliances are installed, with everything properly connected to your home’s services. Finally, the finishing touches are applied, followed by the final inspection and clean-up. Installation typically lasts 2 weeks.


    Design & Consultation: Weeks to months depending on communication.

    Material Selection & Ordering: 2 weeks, longer if more deliberation required.

    Demolition: 1 week.

    Fabrication: 3 – 4 weeks.

    Site Prep: Highly varies depending on the layout and the scope of the project

    Installation: 2 weeks.


    Overall, you can expect your kitchen to be out of commission for around 1 – 2 months, while the whole process may last several months depending on how much consultation is required and how complex the project is. While the process itself can be quite involved, it is a highly rewarding experience and an opportunity to make your kitchen truly yours.

  • Our Cabinet Story: Custom Cabinetry Designed Around Your Life

    Our Cabinet Story: Custom Cabinetry Designed Around Your Life

    At BoxMakers, we know a cabinet is more than just wood and hinges. It’s the backdrop to life’s everyday moments: the midnight snack run, the Sunday baking mess, or the secret spot where birthday presents are hidden. Cabinets are where life happens, quietly, but meaningfully.

    We specialise in custom cabinetry for every room in your home, tailored to your lifestyle and your space. From sleek modern kitchens to warm farmhouse-style designs, every cabinet is as unique as the people who use it. And the best part? You’re part of the design story. Our process is collaborative, ensuring your cabinets reflect your style, your workflow, and your imagination.


    What We Offer: Custom Cabinet Solutions for Every Room

    Custom Kitchen cabinets

    Make cooking a joy and storage effortless. Our kitchens are designed to suit your workflow, with a wide selection of finishes, layouts, and hardware options. From modern minimal kitchens to timeless classic designs, we craft spaces that are as functional as they are beautiful.

    Bathroom Vanities

    Combine elegance with practicality. Our custom bathroom vanities are designed to resist moisture and daily wear while offering clever storage solutions. Perfect for keeping your bathroom organised without compromising on style.

    Closet & Wardrobe Systems

    Transform your bedroom with bespoke closet solutions. From walk-in wardrobes to fitted wardrobe walls, our systems help you organise your clothes, shoes, and accessories with purpose and polish.

    Garage & Utility Storage

    Keep your garage tidy with heavy-duty storage cabinetry designed to handle tools, sports gear, and seasonal items. Everything stays organised, accessible, and out of sight when not in use.


    Why Choose BoxMakers?

    We combine over 15 years of craftsmanship and design experience with practical storage solutions to create custom cabinets that truly enhance homes across the Auckland region. Whether it’s a kitchen, bathroom, closet, or garage, our cabinets are built to last and designed to make everyday life easier — and more beautiful. With our experience and reach, we bring thoughtful, tailored cabinetry solutions to homes large and small throughout Auckland.

    Talk to us about your plans →

  • Storage Solutions with BoxMakers

    Storage Solutions with BoxMakers

    Running out of kitchen space is a familiar feeling for most homeowners: whether it’s crammed cupboards or a crowded benchtop, no one likes to see a kitchen littered with pots, cans, and groceries.

    At BoxMakers, we’ve continually stayed on top of every new development in the kitchen storage space. In decades past, solutions such as pull-out pantries were expensive to implement and often featured a tedious amount of custom design work. Nowadays, storage systems can be installed in every corner of your kitchen, with incredible performance and affordability.

    Tiered Corner Unit

    We all know about awkward kitchen corners and especially how easy it is to get lost in there, knocking down bottles and pans. Thankfully, there are numerous solutions purpose-built for tacking the corner problem. As featured in our Remuera kitchen renovation, tiered corner units can be used to double the amount of practical space, with operation that brings forth everything that’s tucked away. For that, Fit NZ’s Giamo Magic Corner Unit made an appearance.

    Pull-Out Pantry

    Full-size pull-out pantries function similarly to a fridge, but feature intricate rail and extension systems that brings everything towards you upon opening. Our Murray’s Bay renovation featured this to address storage concerns. With Kesseböhmer’s Tandem Arena unit, BoxMakers are confident that those storage woes are thoroughly assuaged.

    Tandem pantry unit, Kesseböhmer, arena style

    Pull-Out Bins

    Sight and smell are your worst enemies when it comes to chucking away kitchen waste. Under-bench pull-out bins are perfect for tucking away all those unpleasantries, and they come in all shapes and sizes. BoxMakers have been frequently impressed with Fit NZ’s Tanova series, which we recently used in our Sandringham project.

    Under-Bench Units

    Make every inch count with an under-bench pantry unit. With different sizes to accommodate spices, bottles, and everyday groceries, these convenient units typically come in 1 or 2 tiers. Our Mount Roskill kitchen renovation featured a Sige Infinity Pullout Bottle Rack, supplied by Enko, which was perfect for complementing kitchen storage.

    Lazy Susan Corner Unit

    Another smart corner addition is the Lazy Susan style of storage units. Also known as carousels, these corner units feature rotational operation to ensure easy access, regardless of where your goods are. Supplied by Häfele, Kesseböhmer’s Revo 90° corner unit is a great example of this, and we recently used in our Mt Roskill project.

    Storage solutions aren’t limited to the above either – new innovations are always being developed and BoxMakers are here to make sure that your kitchen has the perfect space-saving solutions tailored just for you.